


I’m a seasoned painter and I can tell you, a flawless exterior paint job is all about preparation. It’s not just slapping on a coat of paint. You’ve got to repair damages, clean off dirt, sand the surface and apply primer. I’m here to guide you through the best surface preparation methods for top-notch exterior painting. Let’s make your home’s exterior the envy of the neighborhood!
Importance of Surface Preparation
Why is surface preparation so crucial, you may wonder? Well, let me enlighten you. It’s a fundamental step in exterior painting, directly impacting the final result. Material selection and weather considerations play key roles in this process.
Your material selection matters because different surfaces require different preparation techniques. If you’re painting over wood, for instance, you’ll need to sand and prime it first. And it’s not just about the type of material; it’s also about its condition. Damaged or dirty surfaces can compromise the paint adhesion and longevity.
Weather considerations are equally important. You can’t paint in rainy or overly humid conditions because the paint won’t stick properly. Therefore, planning your painting project around the weather is vital. In a nutshell, thorough surface preparation ensures a smooth and durable finish.
Identifying and Repairing Damages
How do you identify and repair damages before starting your exterior painting project? Damage assessment is the first step. I closely examine the surface for any imperfections such as cracks, peeling paint, or mildew.
Here are the steps I follow:
- Identify the damage:
-
- Check for cracks or peeling paint
- Look for signs of mildew or rot
- Choose the right repair materials:
-
- Use a filler for cracks
- For mildew, a solution of bleach and water often works
- Do the repairs:
-
- Fill the cracks and let dry
- Clean off the mildew and let dry
Cleaning: Dirt and Mildew Removal
Having addressed the identification and repair of damages, I’m now turning to the crucial step of cleaning, which involves thorough dirt and mildew removal from the exterior surfaces. Pressure washing is a highly effective method that I often use to eliminate grime. It’s important, however, to use it judiciously to avoid damage to the surfaces. For mildew, I recommend eco-friendly cleaners. They’re not only safe for the environment but also gentle on the surfaces, ensuring no harm comes to your home’s exterior. The key is to let the cleaner sit for a while to let it work its magic, then rinse it off thoroughly. Proper cleaning ensures a smooth, clean surface ready for painting, and contributes significantly to the final result.
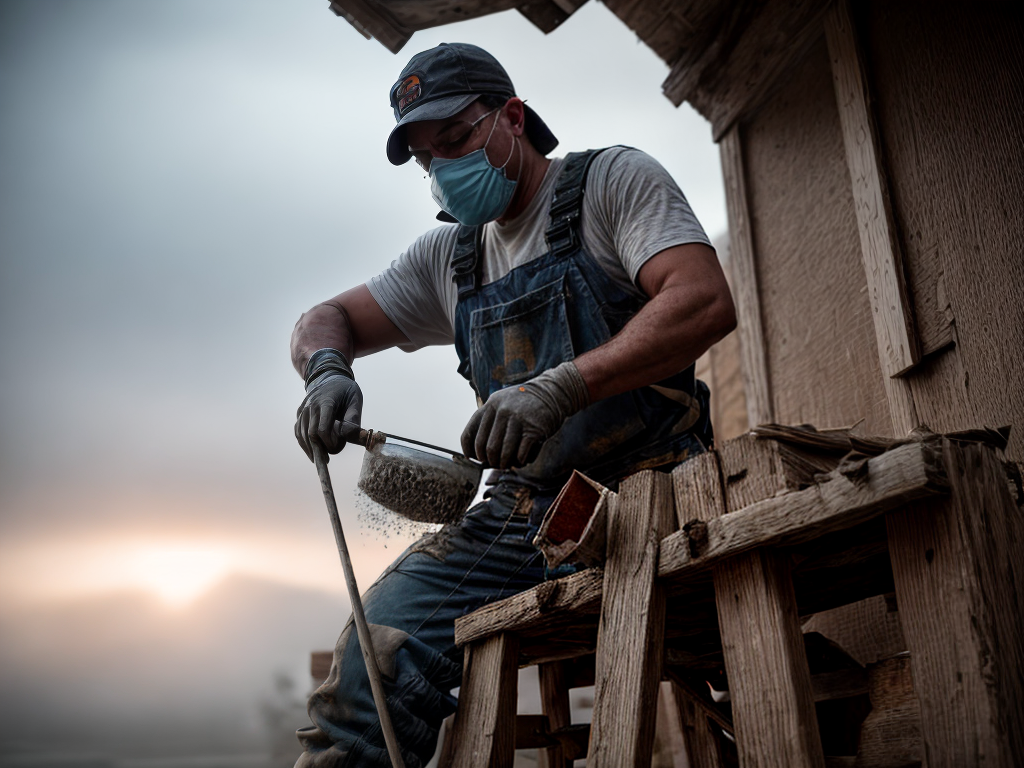
Surface Sanding Techniques
After ensuring the exterior surfaces are clean and free from dirt or mildew, I move on to the process of sanding, an essential technique to prep your home for painting. Here’s a quick guide on how I handle this phase:
- Sanding tool selection:
- Hand Sanding: I use this for delicate surfaces and small areas.
- Power Sanders: I opt for this when handling large areas for time efficiency.
- Dust management strategies:
- Protective Gear: I never forget to wear masks and goggles.
- Clean-up: I use a vacuum or a broom to collect dust immediately after sanding.
Sanding not only smoothens your home’s surface but also ensures better paint adhesion. So, I always take time to do it right.
Primer Application Guide
Next, I’ll delve into the crucial step of applying primer to your home’s exterior, setting the ideal foundation for your chosen paint. Primer selection is vital and should ideally match the type of paint you’ve chosen. For instance, a latex primer pairs well with latex paint. Now, let’s talk about application techniques. Always start with a clean, dry surface. Use a brush or roller, depending on the surface texture and the area you’re covering. Don’t skimp on the primer, apply a generous amount. It’s the primer’s job to provide a consistent base for your paint, so make sure it’s thoroughly covering the surface. Remember, patience is key. Let the primer dry completely before moving on to the paint application.
Choosing Quality Exterior Paints
Now that we’ve laid down a solid foundation with the primer, let’s move on to picking out top-notch exterior paint. It’s crucial to consider not only the color but also the longevity of the paint. Here’s what I suggest:
- Paint Longevity: Opt for paint with proven longevity. It’s worth investing in high-quality paint that can withstand different weather conditions.
- Buy from trusted brands.
- Check for warranties.
- Color Selection: This is where your personality shines. However, it’s advisable to choose colors that blend with the environment and neighborhood.
- Consider the architectural style of your house.
- Think about the visual impact you’d like to create.